The use of Kindle My Clippings Manager for Amazon Kindle is pretty straightforward.
Quick use
- Connect your Kindle Paperwhite to your computer
- Copy the My Clippings.txt into a folder of you computer. You can find My Clippings.txt in the “documents” folder of your Kindle… or you can directly open it from Kindle Highlight Manager
- Start Kindle Highlight Manager and import the file (detailed description below).
- In the Browse window of Kindle Highlight Manager, use the clippings as you want (detailed description below).
- Delete the My Clippings.txt in the “documents” folder of your Kindle. The Kindle will re-create it when you highlight again. Alternatively if you can check “Rename myclippings.txt after processing”.
- Eject your Kindle if needed.
Import Page
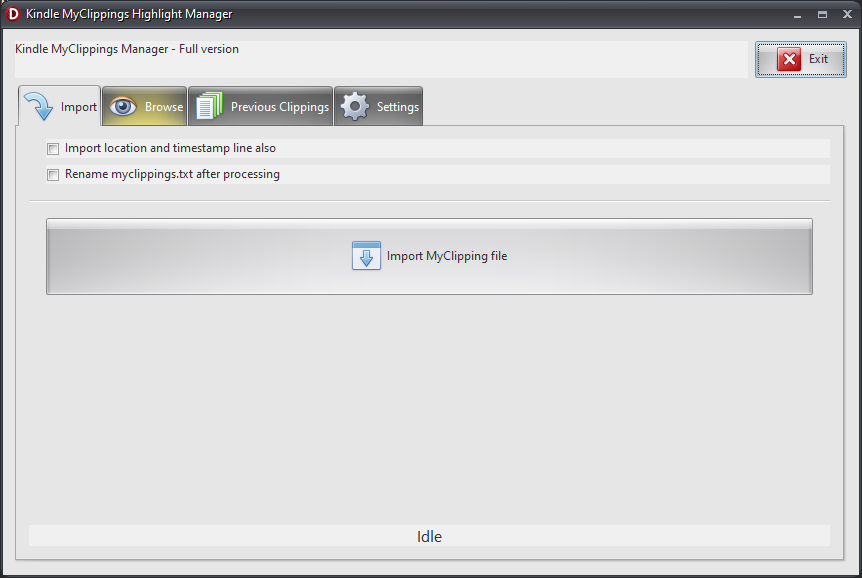
When Kindle Highlights Manager starts, the Import tab becomes active.
Click on the image to see it in full size.
Importing Kindle Highlights
- Click on Import MyClipping file button
- You can choose the My Clippings.txt in a dialog box. After you choose the file, the import process begins. It usually takes about a minute, depending on the length of your Kindle highlights.
You can see the currently imported text constantly changing on the lower part of the window. - After finishing the processing the My Clippings Manager creates a database for the newly imported clippings , opens it and it shows in the Browse tab.
- If “Rename myclippings.txt after processing” was checked before the import, Kindle Highlight Manager will automatically rename the new database to the format set under the Settings tab.
Notes
Import location and timestamp line also check box
If it is checked it also imports the timestamp line.
When it is not checked the import might look like this:
The 6 Rules of Testosterone Building Here are the basic rules to follow if you want to build up your testosterone levels.
When it is checked the import might look like this:
– Your Highlight on Page 143 | Location 2180-2182 | Added on Tuesday, August 16, 2016 2:56:35 PMThe 6 Rules of Testosterone Building Here are the basic rules to follow if you want to build up your testosterone levels.
Rename myclippings.txt after processing check box
If it is checked, Kindle Highlight Manager will rename My Clippings.txt so as you will know next time that you have imported it. The new name would be the original name + timestamp e.g.: My Clippings_03_17_2022_19_52_36.txt. The date format depends on the Settings.
We advice using this check box so as to have a backup of your My Clippings.txt.
Browse Page
The Browse tab becomes active, when:
- You click on it. After starting the application it is empty.
- After finishing an Import. In this case you will see the freshly imported clippings here.
- After opening a Previous Clippings. Likewise you will see the respective clippings you opened (Full version only)
Click on the image to see it in full size.
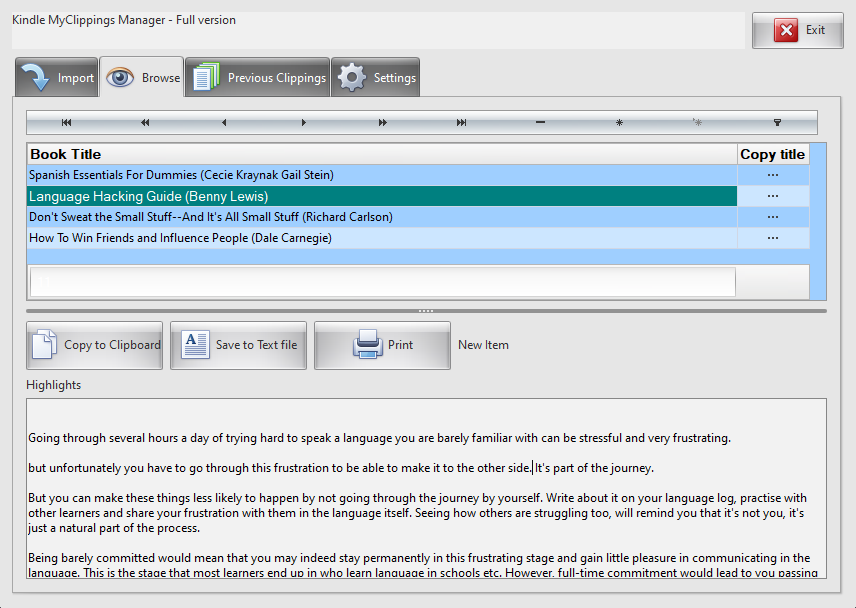
Using the Browse tab
As we wrote above, the browse window can show only one database at a time. Of course one database can consist of many books with the respective highlights. And let’s not forget the Combined Database which contains all the books (detailed explanation under “Previous Clippings” tab).
This window consists of two main parts:
- The books of the imported Kindle Highlights at the upper part of the screen. These are represented in easy to read grid format.
- The linked kindle highlights, of the highlighted book in the grid. This means, if you click on another book in the grid, this part will change automatically. In other words the lower text box will show the text highlights belonging to that book you just selected.
Copy to clipboard button:
It copies the current highlights to the clipboard. You can paste the text in Word, Google sites etc. using Paste command or Ctrl+V.
Save to text file button
It exports the current highlights to text format (.txt). After creation the Kindle Highlights Manager will show the name of the file in a message. The text file would be in the same directory as the KindleMyClippings.exe file and name would be the name of the database you imported / reopened e.g. clippings_2016_07_21_14_20_57.rtf.
Print button:
It prints he current highlights. The letter size is not adjusted (we will improve it soon). If you don’t like this printing function, we recommend exporting to RichText and printing from Wordpad / Word.
Warning
If you have the Kindle Highlights Manager – Basic version, use the “Copy to clipboard”, “Save to text file”, or “Print” buttons before closing the program, because the Previous Clippings will not be available!
Of course you can still re-import the same My Clippings.txt file again to have the categorized highlights if you haven’t deleted the original myclippings.txt.
Previous Clippings
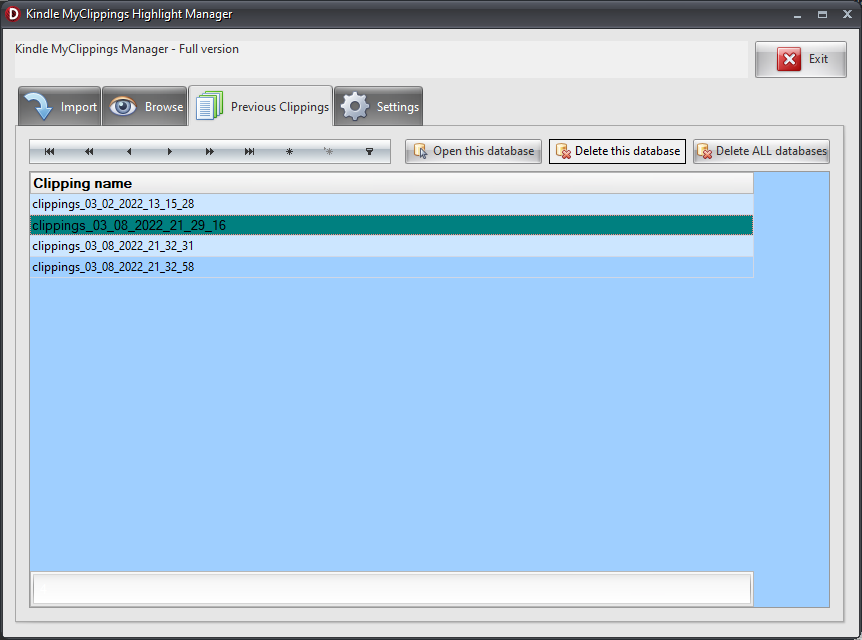
The Previous Clippings tab shows the saved Kindle Highlight databases. Each time you import with the Kindle Highlight Manager, the program automatically creates a database (with current time-stamp). Also, there is a Combined database which contains all the clippings.
Click on the image to see it in full size.
Previous Clippings tab is available in Full version only
In the grid you can see all the existing Kindle highlight databases.
Open this database
Opens the selected Kindle highlights database and loads it under the Browse tab. It is useful if you want to see / edit your previous clippings.
Open Combined database
Every time you import your Kindle highlights, the program saves you clippings in a separate database (as described earlier) and also it appends the highlights to a Combined database as well.
This means that if you have already an earlier imported book with its clipping, the new import will append the new clippings to the end of that book.
Clicking on this button will load the the combined Kindle highlights database under the Browse tab.
Delete this database
As the name suggests, it deletes the selected database which cannot be undone.
Delete ALL databases
It deletes all databases, so it is an extremely dangerous command. It cannot be undone, so think twice before clicking on it.
Full Version
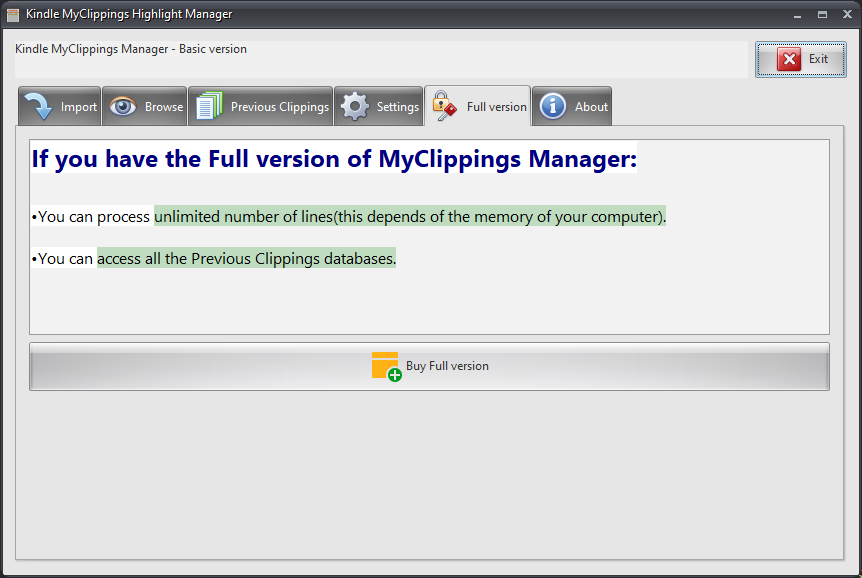
The Full version tab can only be seen if you have the Basic version.
If you click on the “Buy Full version” button, you can buy the full version via Microsoft Store. Remember, after successful pay you must restart the application so the changes can take effect.
Click on the image to see it in full size.
Settings
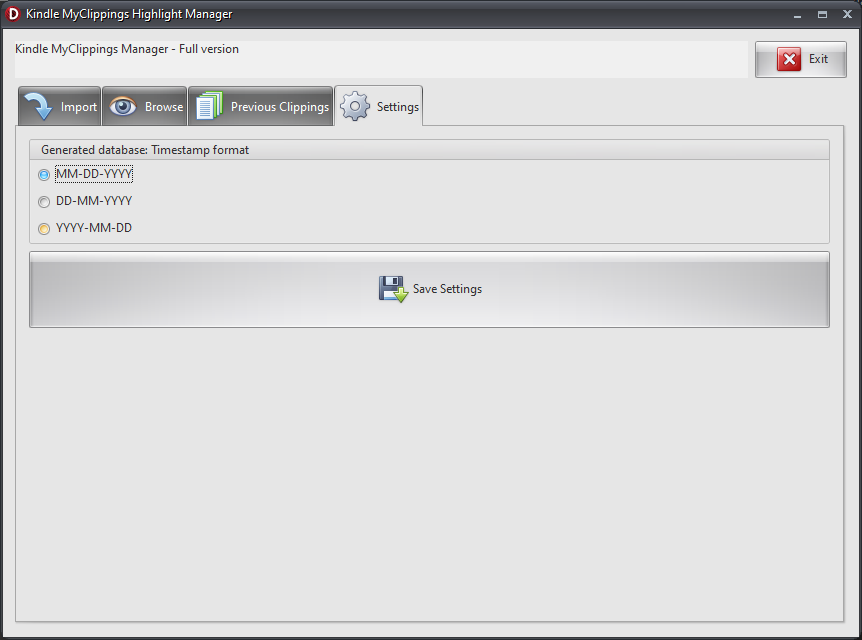
On the Settings tab you can set timestamp format of the generated database name.
Click on the “Save Settings” to update your settings.
Click on the image to see it in full size.